Acoustics is an enormously complex subject. It is physics after all.
To go into anything more than a fundamental level for this article would be both prohibitively difficult to write (book-length) and ludicrously dense with formulas, graphs and specific scientific language. I’m not an acoustician: which is an entire discipline in and of itself.
For this guide, I will be focusing on the practicalities of acoustic treatment in a vocal booth and highlighting the acoustic principles behind these treatments in the simplest possible way.
I aim to provide enough knowledge for anyone to set up a professional recording sounding environment.
To structure this article more relatable, we put out a request through Voquent’s Twitter requesting pictures of our community’s recording studios. Let me tell you now, there was a lot of variety! We had the ad hoc, with just a pile of laundry surrounding the microphone; the homemade, with duvets in strategic locations; to the full-scale studio environment. And everything in the middle!
Thanks so much to everyone for sharing their studio pictures with us. It was a genuine pleasure to look inside your booths! And a special thanks to those we’ve included in the article below.
First up, let’s go over some general acoustic principles, tips & tricks.
Acoustic principles
We’ve noticed that many people seem to be under the impression that you need to create a completely dead room with absolutely no reflections—drastic overkill! You don’t need to create an anechoic chamber.
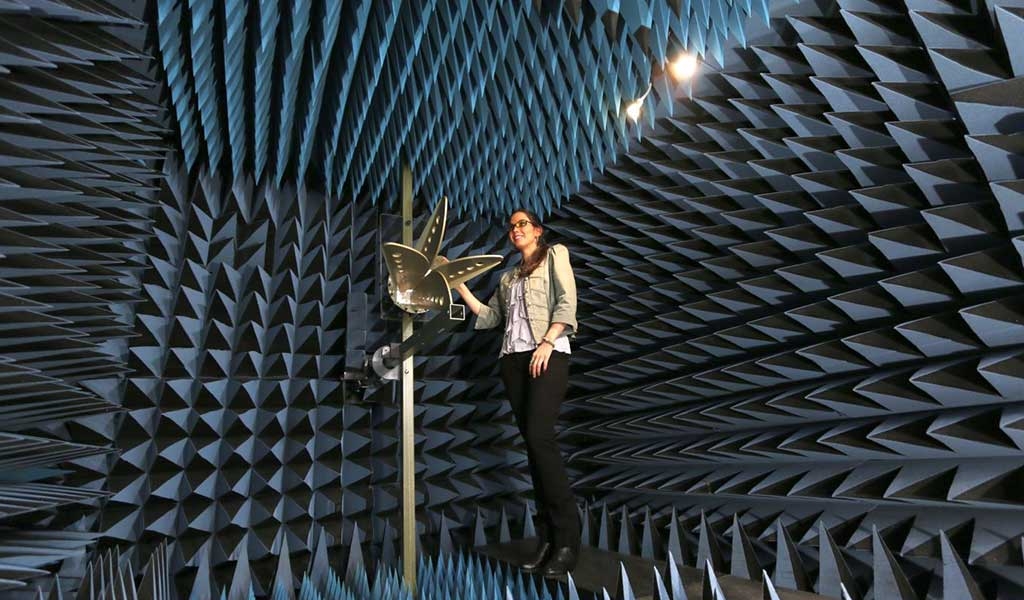
You’d be surprised how many home studios look like this on the walls!
Audio and the human voice ALWAYS exist within an actual physical space. Incorporating some space into the recording, even if it is a voice of God documentary narration, is vital for quality and natural sound—and is even more critical for listening environments, especially if you are engaging in broadcast level mixing and editing.
Some of the previous articles we’ve posted here about interfaces, microphones, or headphones have been more of a detailed list of “what to buy”. Acoustic treatment is far too complicated and variable to have a simple list like this.
The price of acoustic treatment can change drastically based on what you’ve already got to hand, e.g. towels and duvets, and whether you intend to buy acoustic panels. Pricing is also affected by whether you are going all out for sound-proofing or more rudimentary acoustic treatment.
As such, we’ll categorize the options as:
- LOW: less than £150 / €150 / $200
- MID : less than £500 / €500 / $550
- HIGH: more than £/€/$500
Anyway: to business! Let’s have a look at some home studio setups submitted by our incredible community of voice actors.
Harrison’s low-priced setup
This is about as homemade as you can get. And it’s perfectly fine. A recording from this “room” will probably sound better than 75% of other half-done “home studio” environments that haven’t been treated properly.

Ah, studios like this do bring back memories. It may not look the part but it does the job just fine.
A bundle of duvets is FAR preferable to a big empty square room with laminate floors and no furniture. Furthermore, duvets also provide some pretty decent sound absorption even when compared to some ‘professional’ (and expensive) sound-proofing options. If you are recording in a hotel, or your house is near a fairly busy road, then an arrangement like this could be ideal.
Harrison also, very wisely, realized that the computer needs to be outside the duvet fort; otherwise, the whir of the fan will be one of the loudest things on the recording. You’d be surprised how many people bring the laptop in with them. A few recording environments mentioned in this article are otherwise very high quality in terms of acoustic treatment. Still, they have their computer in the same room as the microphone!
However, there are a couple of significant downsides to a set-up like this. The primary one being it will get hot in there very quickly.
For a duvet fort to be an effective acoustic treatment option, it needs to be covered all the way around; this doesn’t only trap the sound, the air gets trapped, and it quickly heats up with a human body in the room.
It will also rustle with every single movement, meaning you have to keep completely still. All these things make it unsuitable for long recordings. Also, you can’t show a studio like this to paying customers. Most Skype live direction is done audio-only. Still, if the client insists on video, they may not be thrilled seeing the voice artist recording in a duvet fort rather than a proper studio (even though it’s acceptable).
The duvet fort is undoubtedly the cheapest of the lowest-priced environments here, and it should be considered a stopgap until you can invest in some proper acoustic treatment that allows you to stand up and move around more freely (and more comfortably).
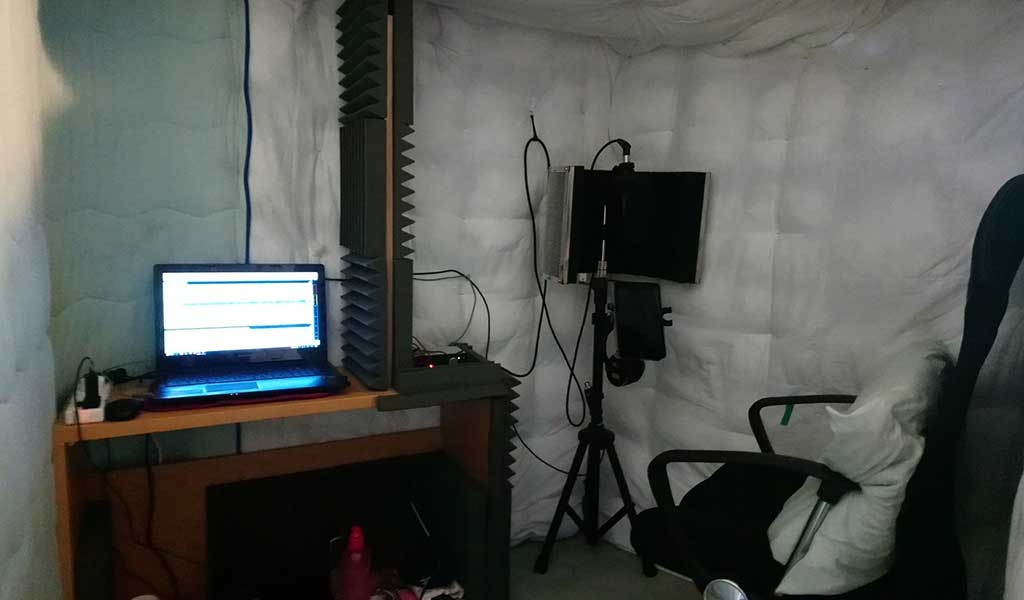
Squeakycheese Productions low > mid-priced environment
Squeakycheese Productions is an excellent example of some other aspects of acoustic treatment and points out some potential issues.
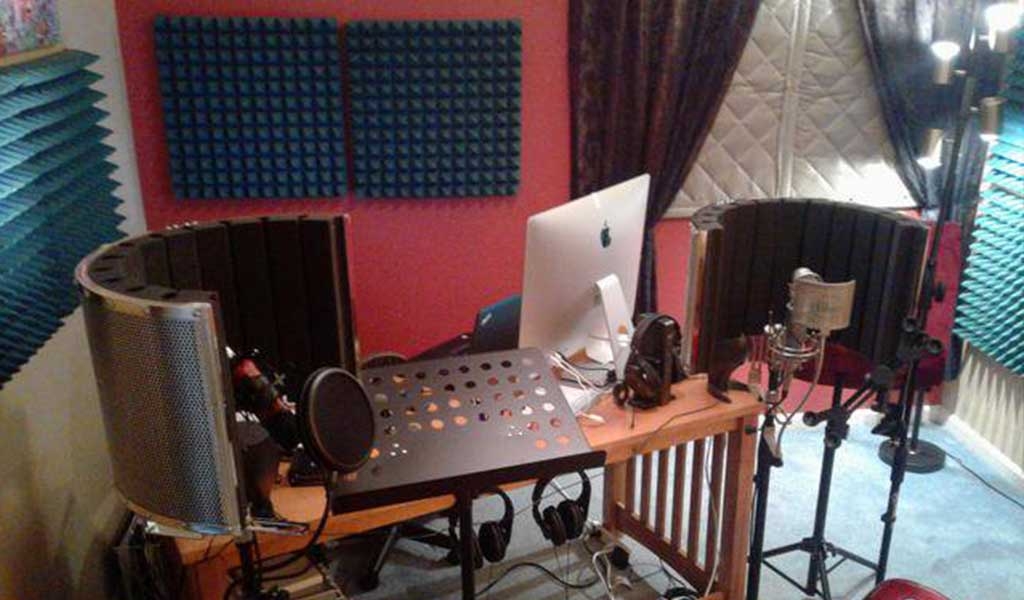
There’s some great acoustic treatment going on here, but it is lacking in some areas.
This studio has excellent acoustic treatments, using acoustic diffusion panels in key locations but not covered the entire wall. It’s a complete waste of money covering the whole wall since reflections that are hitting the diaphragm of the microphone off-axis (basically indirectly) will go through many other scattering and diffusion effects from other objects in the room before returning to the microphone.
Only the direct lines at the microphone level need to be worried about unless you are in an empty, tiny, cubic room.
The SE Reflexion Filter will help prevent reflections and make the room’s size generally smaller sounding. However, it’s open at the top and bottom in this setup. This means there is a risk of direct on-axis reflections above and below the microphones. There is only a very thin carpet below the microphones, and although we can’t see the ceiling, it’s unlikely to have treatment. A few extra diffusion panels will quickly fix this, though, and it will not require completely re-designing the studio!
Another potential issue I have noticed is that the microphones appear to be positioned off-axis in relation to where the voice talent sits, leading to problems. The microphone may end up being on-axis to the reflections from the floor and ceiling, along with other indirect reflections. This is something that can easily be fixed by simply moving the microphone. In terms of acoustic treatment materials, this studio could realistically be considered low-to-mid priced. The SE Reflexion Filter is probably the most expensive thing, but the panels are not pricey and ideal for the job.
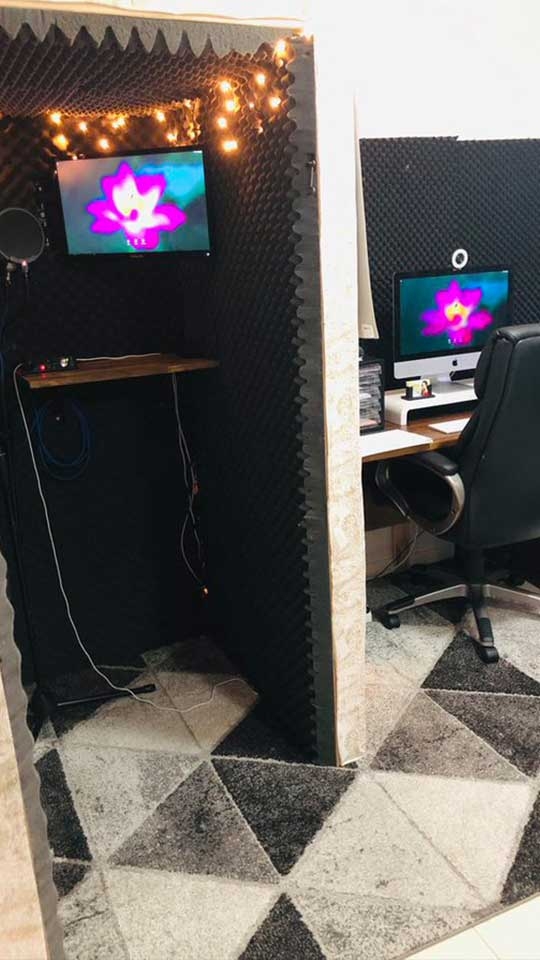
Mike’s mid-priced setup
Mike’s studio is a fine example of a largely homemade well-treated home studio to show you that acoustic treatment for voice-over doesn’t cost the earth.
Voice actor Mike’s homemade home studio acoustic treatment
Mike has used office dividers (which have a certain amount of acoustic treatment), covered them in duvets, then suspended one above them. The use of duvets around the microphone and performer will absorb most reflections. The use of something that looks very much like the SE Reflexion Filter alongside this duvet based acoustic treatment ensures the microphone will sound great with very few reflections but still natural. Over-treatment can make the room sound ‘artificially’ small – boxy and unpleasant. As I mentioned above, every sound exists in a natural space, and you always want to try and preserve some amount of ‘room’ in any recording.
Every sound exists in a natural space.
One key thing Mike has done that many neglects are to treat the area above the microphone acoustically. There are reflections from the floor and ceiling, just as there are from the walls. Leaving out the dampening above the microphone will make a Reflexion filter and the acoustic treatment on the walls largely redundant. In the case of acoustic treatment, a job half done is a job you might as well not have even started! The floor can be trickier to treat. The best you can usually do is to reduce reflections somewhat rather than absorb the sound. Mike’s setup is okay because he has carpet. This setup can be considered comfortably mid-priced, mainly due to the office dividers. Office dividers are pretty pricey unless you find them in a skip or inherit them.
Joyce’s mid-priced studio
Joyce has a great studio with a room within a room. She’s covered the inside of the small squared-off room with diffusion / dampening panels. This is good so far, but it gets even better when you realise she has specific corner bass traps too! Hooray!

Corner diffusion! Huzzah!
Corners are bad for forming something called a standing wave at low frequencies, making the voice-over recording muddier and less pleasing to the ear. Having some specific wedge-shaped sound dampening panels in the corner will help, particularly in a small booth set-up like this.
However (why is there always a however?), every room is different, and every room will have different frequencies that they resonate.
Think of the standing wave as the wavelength that “fills” the room. Say, for example, that you have a room with a set of speakers at one end and a flat wall opposite it. Everything will reflect off that flat wall, but there will be one frequency (and its associated harmonics) that will perfectly fit the size of the room. These are the specific frequencies that need treating, and corners are notoriously bad for causing this problem.

A simple graphical representation of a standing wave.
There are various types of bass traps made from other materials. Whether you get a porous or non-porous material may depend on the intensity of the standing wave in the room. You may notice in your searches that some bass traps are flat and are intended to be placed diagonally across the corner, leaving an air gap to take advantage of the ‘quarter wavelength rule’ —thus enabling you to reduce low frequencies with large wavelengths by taking up less space. Ok, that’s a ludicrously basic version of the facts, but it’s a close enough description!
In any case, Joyce’s simple corner foam pads will work well for their purpose, i.e. a small vocal booth where the standing waves are unlikely to be too disruptive based on the limited frequency range of a human voice. One potential issue is the acoustic treatment on the wall opposite the booth in the picture.
There are no pictures of this wall, so I cannot pass any specific judgement, but if the wall is flat and bare, it will undo some of the excellent work of this booth with the reflections coming from directly behind the voice-over artist/engineer. Of course, some of the reflected frequencies are absorbed by the person’s body, sitting in front of the microphone. Still, it is vital to ensure that reflections are minimised in every key area. Joyce’s setup is likely to be within the mid-priced range, although the quality of the corner bass traps seems relatively high, and some brands can be expensive!
Aimee’s mid >high priced acoustic treatment
Aimee sent in this picture of her recently created vocal booth, with ingenious screen mirroring. This studio looks indistinguishable from most professional studio environments in terms of acoustic treatment.
This might look like a lot of diffusion pads. And that’s because it is. This is a great set-up.
As I mentioned above, the only time you need to have acoustic panelling/diffusion covering every square inch of wall is when you have a completely square recording room—which is the case here.
These panels are relatively inexpensive, but getting hundreds will add up! Creating a little booth and covering the interior of that with diffusers to prevent the most unpleasant reflections is the perfect solution.
There is one possible issue with this (the corners of the booth) which I will come to later. Aimee’s booth also has a soundproofing element. It’s too complicated to explain in detail, but having a room within a room can reduce the relative decibel level of the noise outside of the second room.
The reason is that the sound wave is having to expend energy every time it hits new material. In this case: the wall of the booth and the air in the surrounding room. For sound waves: energy = amplitude = loudness.
The sound wave expends energy by changing the state of the matter that it is vibrating in and the specific material itself, reducing the loudness in both directions. Would you please bear in mind that this is a very simplistic explanation! As I said at the start: acoustics is science.
The foam panels on the walls behind the speakers in the listening environment are probably a bit overkill. It is much better to place the speakers further away from the wall (there will be recommendations in the instruction manual for your speakers) and forgo that sort of diffusion behind the speakers. It would make more sense to have the diffusion panels on the wall opposite the speakers, behind the listener, to reduce reflections from there. The reason to move the speakers away from the wall is similar to the motivation to record further away from the microphone—the boundary effect.
Again this is complicated but basically, it causes some sound waves to be obliterated through phase cancellation and others to be artificially boosted through similar phase properties. Suffice it to say:
Move the speakers away from the wall and put the diffusion behind your head.
This set-up is probably high-priced due to the construction of a room within a room and the copious amount of diffuser panels needed. If you’re crafty with DIY and can get some reclaimed wood, you may be able to do this mid-priced, but the cost will naturally shoot up if you need to hire a joiner.
Mark’s swanky high-priced setup
Mark has an Esmono booth. I’m not sure of the exact specification of his one or how much it cost Mark (I’m not that nosey), but the prices start from GBP 6,000. Which quickly puts this setup in the high-price bracket!
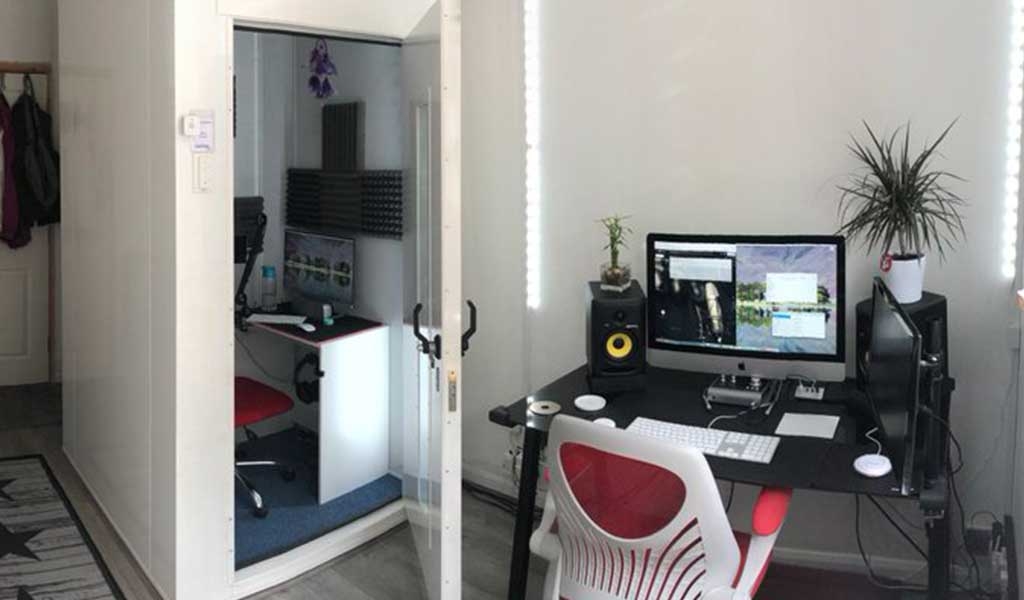
A swanky Esmono booth. Tasty.
In terms of sound isolation and internal acoustic treatment, this booth provides everything you need. It enables Mark to stand further away from the microphone and project his voice without loads of unpleasant reflections.
As previously mentioned, any reflections can make the recording sound boxy, and it’s great not having to worry about that. The only reasonable criticism I can make of Mark’s setup is the listening environment. He’s broken a cardinal rule.
Never put anything on top of your speakers.
The speakers generate sound waves in the air by vibrating. That means they will vibrate whatever you put on top of them, too, such as ornaments or plants, especially at higher loudness levels. I would also recommend some acoustic treatment in the form of diffusion and placing the speakers further away from the wall. These are simple fixes that will improve the listening experience.
It’s a great setup, though and if you’ve got the cash and don’t want to go through the hassle of building an entire room within a room and calculating the acoustic specifications for the booth. You can’t go wrong with these Esmono booths (other brands are also available).
So there you have it!
You’ve got three potential price points, but ALL of the studios here have something in common: they are all, to varying degrees, a room within a room—even the duvet fort (which I love).
Suppose you want to record a voice-over in a bigger space. In that case, you will need to invest in soundproofing and acoustically treating the entire perimeter of that room – essentially by building a room within a room. This expense puts you in the realm of building an actual recording studio. A far more considerable investment of time and energy. Nevertheless, the broad acoustic principles still apply. Here’s a summary of the key points:
- DO: create a room within a room by using one of the methods above
- DO: be aware of reflections behind, above and below (as well as the more obvious ones)
- DO: try and avoid recording in an empty square room – books and clothes are perfect acoustic dampeners!
- DON’T: overdo it with foam diffusion pads – only use in particularly reflective areas
- DON’T: spend a fortune if you can’t afford it. Just observe the basic principles of acoustics, and you’ll be fine.
5 Tips For Perfect Microphone Technique


More from this author


Sometimes we include links to online retail stores such as Amazon. As an Amazon Associate, if you click on a link and make a
purchase, we may receive a small commission at no additional cost to you.