When looking into how to make a home studio, there are many things to consider.
Some aspects of the process will be optional, but others will be necessary for the home studio to succeed.
Today, we have identified a list of 9 things you will need when making a home studio. For this list, we made sure to include expert advice from our in-house audio engineers. It is an introduction to cover the basics of what equipment you will need to get started.
So, sit back and enjoy!
1. Professional microphone
Duh? Right? Well, before you start thinking about your DIY home studio setup, you will need to get a hold of a microphone. But the process isn’t as simple as it may first seem to a newcomer. There are many options out there, and different microphones serve different functions.
Condenser mics offer higher sensitivity than dynamic microphones, the most common alternative. It is ideal for picking up everything within its frequency range. This means it will pick up every whisper or shout with a clarity that is hard to beat. There are also two types of condenser microphones: large-diaphragm and small-diaphragm. Large-diaphragm condenser microphones are ideal for voice-over purposes due to the wider frequency response. And remember: always avoid USB mics!
For more information, read our blog: What is the Best Microphone for Voice Over?
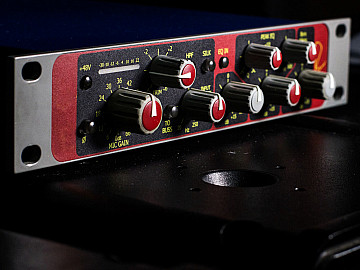
2. Audio interface
The audio interface interprets the audio signals from the condenser microphone to your computer. An audio interface consists of a pre-amp and an AD/DA converter, which work together to enable the digitalization of the analogue audio signal. The AD/DA converter handles converting the signal itself—the pre-amp drives, making the sound louder (pre-amp is short for pre-amplification). A high-quality audio interface will improve the sound of the digital recording. The pre-amp will amplify the sounds that matter (the signals) without amplifying the sounds that don’t (like noise). A quality pre-amp offers a low signal-to-noise ratio. Generally, the higher quality of the pre-amp, the lower SNR. An audio interface takes the sound signal from the mic and converts it into a digital signal for recording.
When using a large-diaphragm condenser mic, it’s vital to choose an interface with phantom power. Phantom power (usually called +48v on the interface itself) boosts the signal from a condenser microphone by sending power to it along the XLR line. Some older microphones will have separate power sources you plug into the wall, but this isn’t very common anymore – most condensers use phantom power to boost the signal before it even gets to the pre-amp, which boosts it even further.
Check out the excellent buyers guide to audio interfaces by Voquent’s senior producer Alex Harris-MacDuff.
3. Pop-shield
A pop-shield is another essential piece of equipment that you will need. So what is it, and why do you need it? A pop shield sits in front of the microphone and filters out sounds that you may not want in your recording. It helps to reduce the presence of sounds like plosives, sibilance, and some breaths that may be in the recording, but unwanted. It absorbs some of the hard and jarring ‘p’ ‘t’ ‘d’ and ‘s’ sounds, naturally produced during speech and singing. You can make a pop filter if you are looking to stretch your budget (and an old pair of tights), but buying one isn’t too expensive. They’re not particularly hi-tech, but they’re a requirement!
4. Microphone stand
Is a microphone stand needed? Surely, I can just carefully hold the microphone? While this is a reasonable assumption to make if you’re a rock ‘n’ roll singer, the answer for VO is simply no. Holding a microphone for professional voice-over recordings will open the door to all kinds of unwanted sounds in your recording. A condenser microphone will record everything – even the sound of your hand shifting around on the microphone’s outer casing. Every little bump and scrape is picked up.
There are countless quality stands available, but you will undoubtedly need a stand with rubber feet. This will stop the stand from moving when you don’t want it to and reduce any rattling from the environment. Be sure to also select a microphone stand with a boom arm for stability. Lastly, adopting the use of a cradle or shock mount will reduce the microphone’s movement. This will eliminate small rumbles due to environmental factors—things like a heavy truck or train shaking the ground. A cradle or shock mount acts as a suspension for your microphone. As a last bit of advice, always record on a level surface.
5. Acoustically treating the environment
Arguably the most important aspect for a home studio set-up is an acoustically treated room. Choosing to go into the voice-over industry without any sound treatment won’t get you very far. The sound quality of the recordings you make won’t be up to par with the professional standard expected. But why is acoustic treatment necessary? Well, sound waves bounce off any surface, particularly hard surfaces like bare walls. Acoustic treatment can reduce the reverb and reflections that a mic will pick up from an untreated room. Without it, it will sound extremely reverberant (depending on the size of the room) and creates major headaches for professional audio engineers. ‘Boxy’ is often a complaint about recordings in small, square rooms – it can literally sound like it was recorded in a box.
There are various acoustic treatment options available, depending on your budget. DIY treatment with a pillow/duvet fort is a plausible low-budget solution. They don’t look great, so I’d avoid turning the camera on for a Zoom call, but they do the job fine when set up well. There are many different tutorials online that can help you take this route. Other simple techniques like picking your placement in the room, closing the curtains, or putting the mic stand on top of a rug are low-to-no cost fixes too.
A mid-range budget option is to buy an acoustic shield. This is a contraption that sits around the microphone quite closely to reduce sound wave reflections. The higher-end alternative is to buy and install acoustic wall panelling. This can be costly and requires dedicating a small portion of your home in the process. Most acoustic panelling will need to be installed on a wall at points where sound reflects the most. Such as behind or above the mic. This often requires quite a detailed knowledge of the science of acoustics, so definitely don’t attempt this unless you can get some expert advice! You can get self-standing acoustic panels, which are like big acoustic shields. But these tend to up the cost even more. High-end acoustic treatment means permanently taking over a spare room or walk-in closet– so do keep that in mind.
Learn more about acoustic treatment options in this article.
6. Studio headphones
Headphones are another necessity. How will you hear how good your voice is without them? When starting, it is a common misconception that any old headphones – or even earphones – will do. Not the case. Earphones are a big no in professional audio across multiple disciplines, including voice-over, so don’t use them. Ideally, you will want to go for closed-back headphones rather than any other type. This is because they are ideal for keeping sound inside the earpieces themselves. Their closed-back negates how much sound escapes and thus bleeds into the recordings. Another thing to avoid is buying an all-in-one gaming headset, or a microphone and headphone combination headset. These are, other than earphone and microphone combinations, the worst for voice-over work. You can’t use the mic built into headphones for recording voice-over, so it’ll just get in the way. Also, avoid noise-cancelling headphones, these introduce all sorts of problems that are too complicated to explain here!
To find out more, you can also read our in-depth article on headphones for voice-over.
7. Cabling
Without the right cables, you can’t do any recording. Many people think that the condenser microphone will be a USB plug-and-play piece of hardware, but this is not true. A condenser microphone requires XLR cables to transmit the audio information to the audio interface. This interface will then connect to your computer or MAC via USB cable. It may seem easier to cut out the middle-man (the interface) and just get a USB mic, but this is really a false economy.
USB mics are never as high quality as even cheaper large-diaphragm condenser and audio interface combos, and generally introduce a lot of unwanted noise and hiss. You will always need at least an XLR cable and a USB cable to connect everything to the computer – not just one or the other, but both. That moves us onto the next piece of hardware you will need, but more than likely will already have.
8. PC or MAC
Along with all the specialist audio hardware, you will need a central hub to actually record the audio, and this is where your PC or MAC will come into play. Generally speaking, you won’t need a particularly powerful machine for recording a single voice-over channel. It gets more complicated if you’re multi-tracking an entire band, but that’s not really what this article is about anyway, so I don’t know why you mentioned it, to be honest. Weird. Most of the audio interfaces out there will be compatible with a PC or Mac’s input ports. There is usually a USB input, but can sometimes be Thunderbolt or (if you’ve got an old computer) Firewire.
Most built-in motherboard sound cards will do the job in terms of processing. Yet, upgrading to a dedicated sound card will improve various things. There are various sound cards with lots of connection types and features, such as DSP and plug-ins. However, for voice-over recording, we would recommend using what you already have. You only need a standalone or upgraded sound card if you are mixing a lot of things to a high level OR you are recording more than one or two tracks simultaneously.
The only natural limitations for your PC or Mac will come from the Digital Audio Workstation software you use. The best processors (aka CPUs) and RAM will increase your editing potential and rendering speeds. And, if you don’t plan on doing any video editing you can pretty much ignore the Graphics Card as a component. Always check the manufacturer’s website for the minimum specs for any DAW.
Read more about the top operating systems and editing software for voice-over.
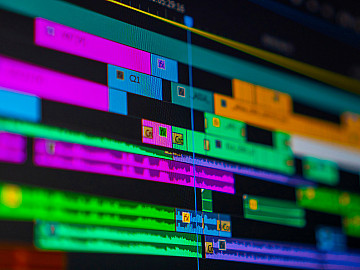
9. Software applications
Software applications for your MAC or PC are the last thing you will need to buy, but certainly not the least! Even with everything else purchased and plugged in, you won’t be able to record without the Digital Audio Workstation (or DAW). Audacity is a reasonable, free application that records voice-over to an acceptable standard. While you can also use this to edit your audio, it isn’t something we recommend. Audacity doesn’t have the same functionality as other paid applications. It’s fine for basic edits, but for more professional delivery specs and editing, a bespoke DAW is much better.
If you are looking for something more professional, then there are several options. On a PC, Reaper or Adobe Audition are good choices. For Mac, we would recommend ProTools or Logic. Garageband is free on a Mac, similar to Audacity (which is on both Mac and PC), but it does have certain limitations that make it not ideal for VO since it is primarily a music production DAW.
Generally, it’s better to get something else. Out of all the applications, our engineers recommend ProTools, if it is within your budget. It’s an industry-leading application for a reason. It’s stable and easy to configure. It doesn’t work as effectively on a PC as a Mac and can be trickier to set up, so if ease of set-up on a PC is a requirement then something like Reaper or Audition may be preferable. However, Pro-Tools is the industry standard, so having a familiarity with it will be very useful for your career!
In Summary
When looking into how to make a home studio, there are many things to consider and many avenues you can go down. We hope you’ve got a better idea of what’s involved. Getting started on your home studio journey for the first time? Give us a shout on Twitter. Good luck!
5 Tips for Perfect Microphone Technique


More from this author


Sometimes we include links to online retail stores such as Amazon. As an Amazon Associate, if you click on a link and make a
purchase, we may receive a small commission at no additional cost to you.